Setting up Twilio Function for Sending Text and Whatsapp Messages

The joy of having a scalable, secure messaging service, while not bothering about infrastructure. Allowing you to move fast from writing business logic to production is what Twilio function offers. Today, we will look at the step by step process of setting up Twilio functions for sending Text and Whatsapp messaging. We will be creating two functions. The first one will send Whatsapp messages and the second one will send text messages.
Requirements
- A free or paid Twilio account. If you are new to Twilio you can sign up by clicking here.
- Knowledge of javascript or a desire to learn.
- Web browser.
- A device with Whatsapp installed on it and working.
Setting up a Twilio function
- After logging in to your Twilio account.
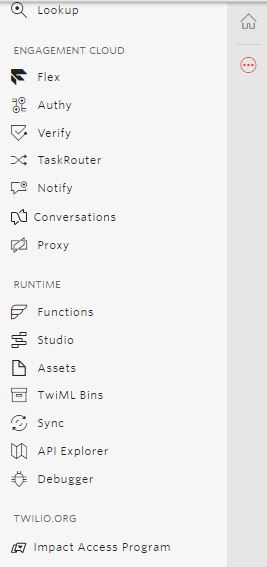
- Click on the icon with the three dots at the left top corner below the home icon to open the menu.
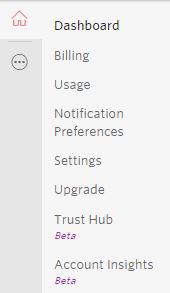
- Clicking on the icon opens the sidebar, on the sidebar scroll down to the RUNTIME section and click on Functions.
- We need to create a service. A service is like an application container to store your functions for a project. To create a service, we click on the create service button

- Clicking on the button, a modal popup asking you to name the service. The name will be the first part of your serverless domain.
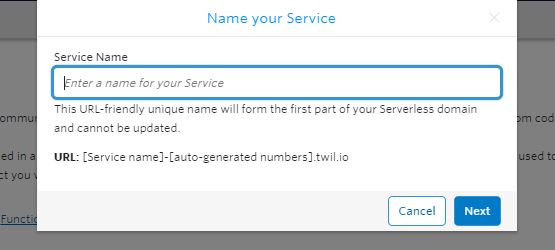
After inputting the name and clicking on the Next button. It creates a service.
We next add a function to the service by clicking on the add button at the top left side of the screen.
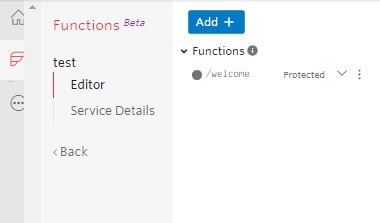
- Click on the add function option. Input the name of the function and press the enter button. The function forms and a code sample in the code editor appear to get you started.
Sending Whatsapp messages
After setting up a function we need to configure it to send Whatsapp messages. The following steps below explain how to do it.
- Click on the three horizontal dots beside the function name. Select the
Copy URLoption. - Click on the icon with three dots on the top left corner of the screen to open the side menu.
- Select Programmable messaging.
- Select Settings at the bottom of the sidebar menu.
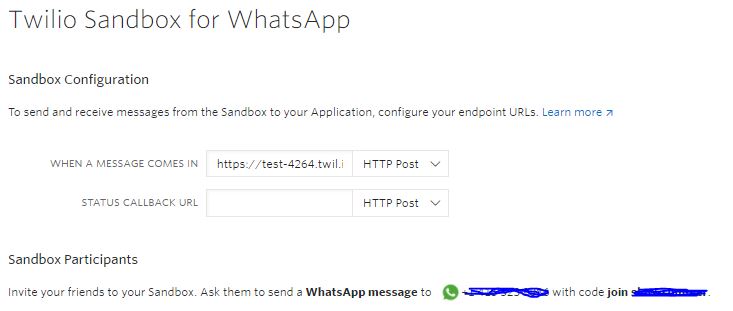
- Select Whatsapp Sandbox Settings
- Input the URL generated when you created the function into
WHEN A MESSAGE COMES INfield. - Scroll to the bottom and click on save. Let us move back to the code editor of the existing function. Follow steps two(2) to three(3) steps mentioned when discussing how to set up a Twilio function, above.
- Click on services or manage services.
- From the list of existing services, click on the service we are working with.
- Click on the function you are working with to ensure it appears on the code editor if it is not open.
- Delete the entire content of the function block except for the return statement.
- Paste the following code to send a hello world response back when we send a message.
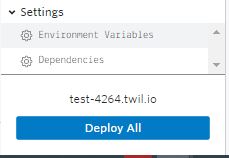
let twiml = new Twilio.twiml.MessagingResponse(); twiml.message('Hello World'); - Click on Save and after saving click on Deploy All. Below is a GIF showing the entire process.
Test
To test what has been done so far, we need to go to step five(5) of sending Whatsapp message above to get the Whatsapp number and sandbox name.
 On your device open your Whatsapp application and send join to the number to get it connected.
Send any message to the Whatsapp number and get the hello world message specified in
On your device open your Whatsapp application and send join to the number to get it connected.
Send any message to the Whatsapp number and get the hello world message specified in twiml.message('Hello World');.
Sending a Text message
To send text messages we need to set up a new function. On creating the new function, we set the necessary environment variable and visibility of the function.
Setting Environment Variable
To set environment variables we need to follow this few steps:
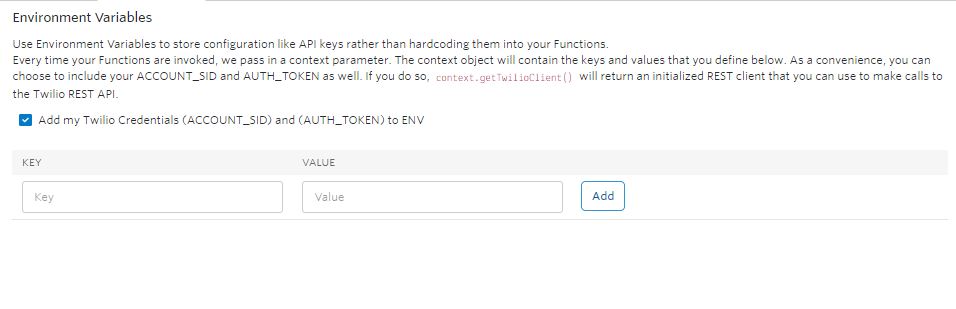
- Go down to the Settings section at the bottom towards the left and click on Environment Variables.
- Click on the check box that says "Add my Twilio Credentials (ACCOUNT_SID) and (AUTH_TOKEN) to ENV". If it is not checked already.
Set Function Visibility
Every function by default has their visibility set to "Protected" which means we need to have a valid Twilio signature to our request headers to invoke the function. For this tutorial, we will be using the "Public" option that allows us to invoke the function from the browser. To set the visibility of a function we:
- Click on the drop-down menu to the right of the function name
- Select the visibility we want, which for now is public.
We go back to the function block, delete every code in it, make the function asynchronous and add a try-catch block.
exports.handler = async function(context, event, callback) {
  try {

 catch(error) {

  }
}
Next we:
- Make a call to getTwilioClient method. It is in the context parameter. The context parameter is where we can interact with the environment variable and also the pre-initialised Twilio REST Client. So it returns an initialised twilioClient.
const twilioClient = context.getTwilioClient(); Set the variables to, from and body using the event parameter or a pre-defined value.
let from = event.From; let to = event.To; let body = event.Body;- Make a call to the Twilio REST Client API by passing by chaining the create method to messages method and the message method to the twilioClient. We pass the body, to and from variables in an object to the create method.
await twilioClient.messages
.create({
  body,
  to,
  from,
});
- Make a call to the Twilio REST Client API by passing by chaining the create method to messages method and the message method to the twilioClient. We pass the body, to and from variables in an object to the create method.
Add the return statement both in the try block and also the catch block.
return callback(null, 'success');to the try block andreturn callback(error);to the catch block.- Click on save and then on Deploy All after saving.
The code will finally look like.
exports.handler = async function(context, event, callback) {
  try {
    const twilioClient = context.getTwilioClient();

    let from = event.From;
    let to = event.To;
    let body = event.Body;

    await twilioClient.messages
      .create({
        body,
        to,
        from,
      });

    return callback(null, 'success');
  } catch(error) {
    return callback(error);
  }
}
Testing
To test the SMS sending we
- Click on the three horizontal dots beside the function name. Select the
Copy URLoption. - Open a browser and paste the URL there
- Add the query parameters From, To and Body in this manner.
?From=+15095550100&To=+15105550100&Body=Hello%20WorldIt is important to note that if you are using a trial account. From will be your trial phone number found on your dashboard. To will be the number used in creating the Twilio account or any other phone number you add to it. - Attach it to the URL in the browser and get a success response.
Conclusion
If you have made it this far, thanks. We looked at how to set up Twilio functions to send SMS and Whatsapp messages. How it does not need installing Twilio in your codebase and allows your messaging service to run outside your application. Drop your comments and feedback in the comment section and click on the like button. Thanks.